1. Understanding the Basic Structure and Function of Plastic Lotion Pumps
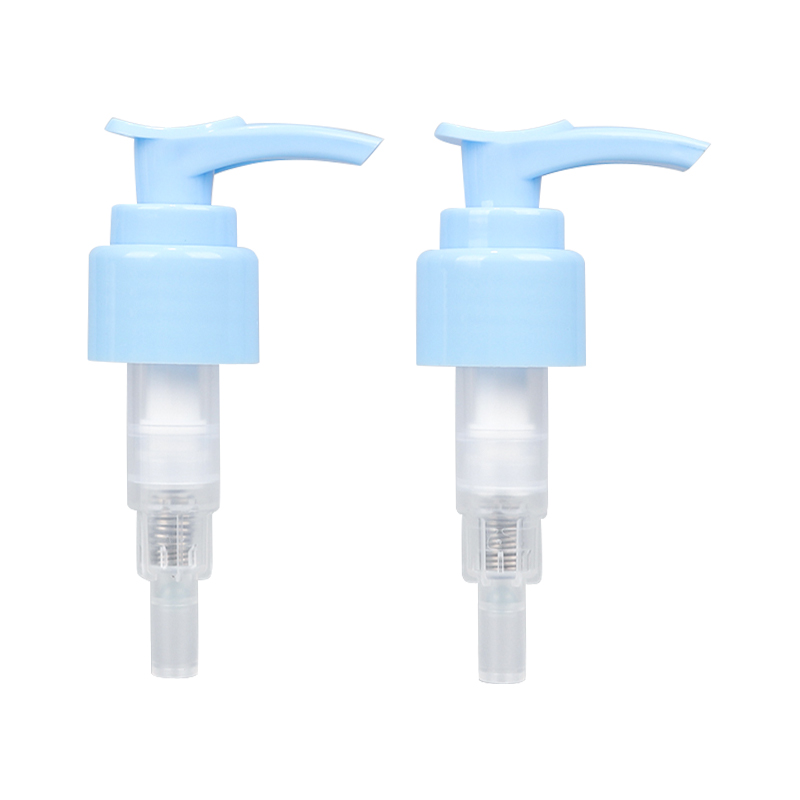
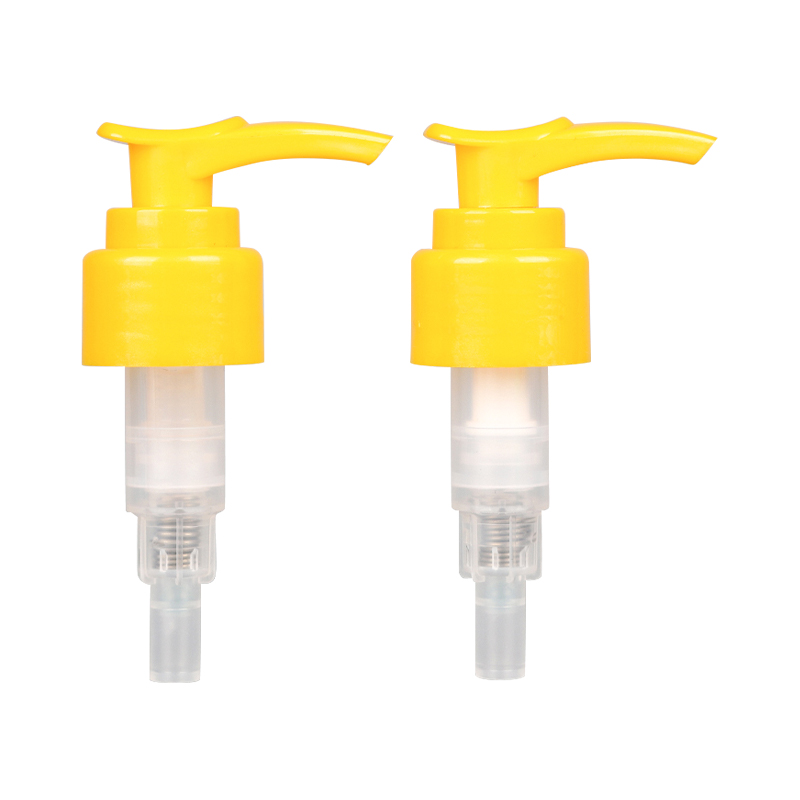
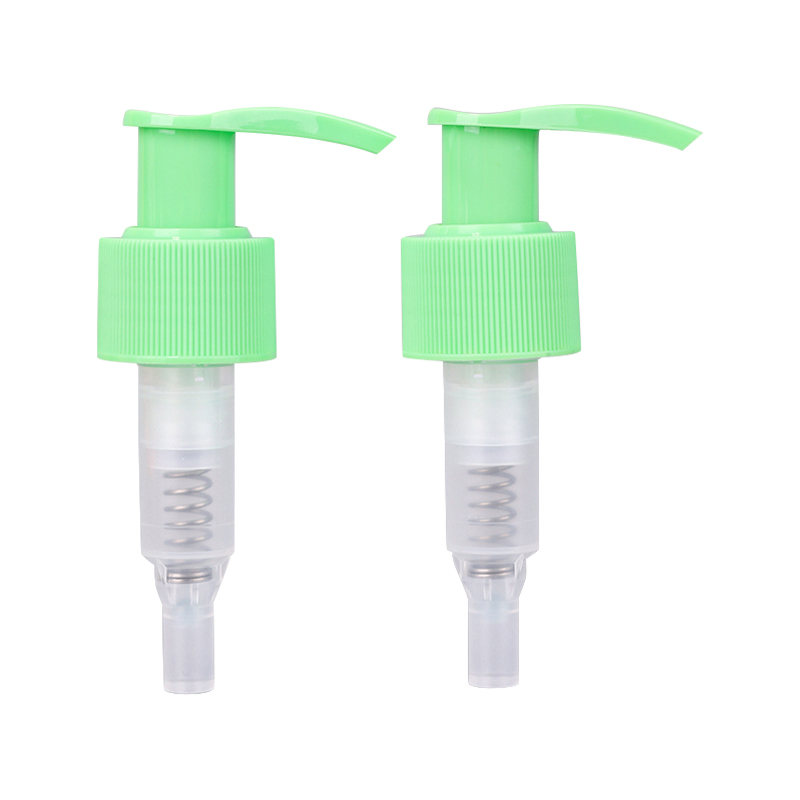
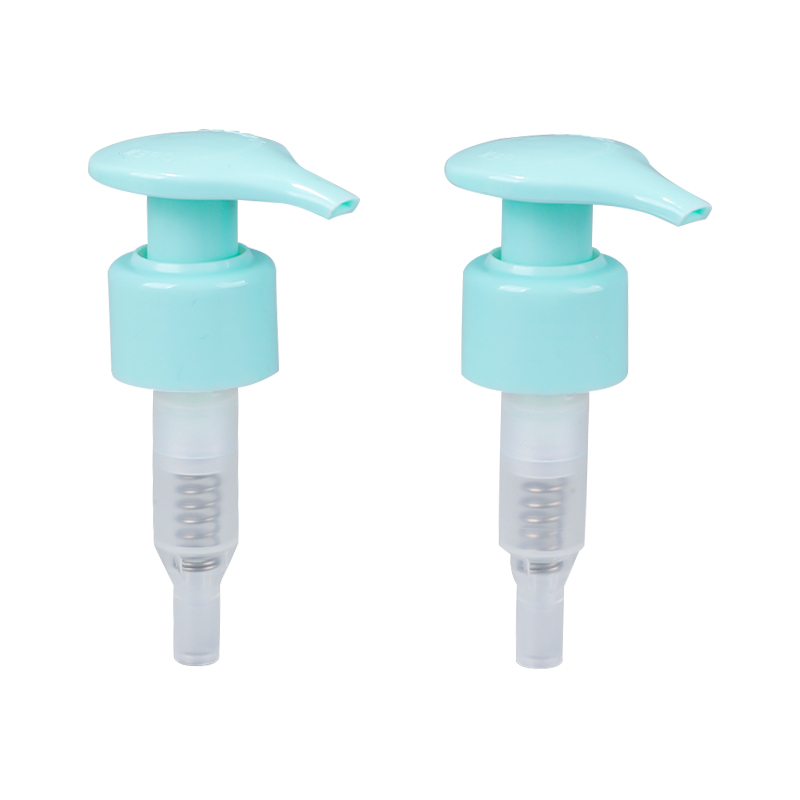
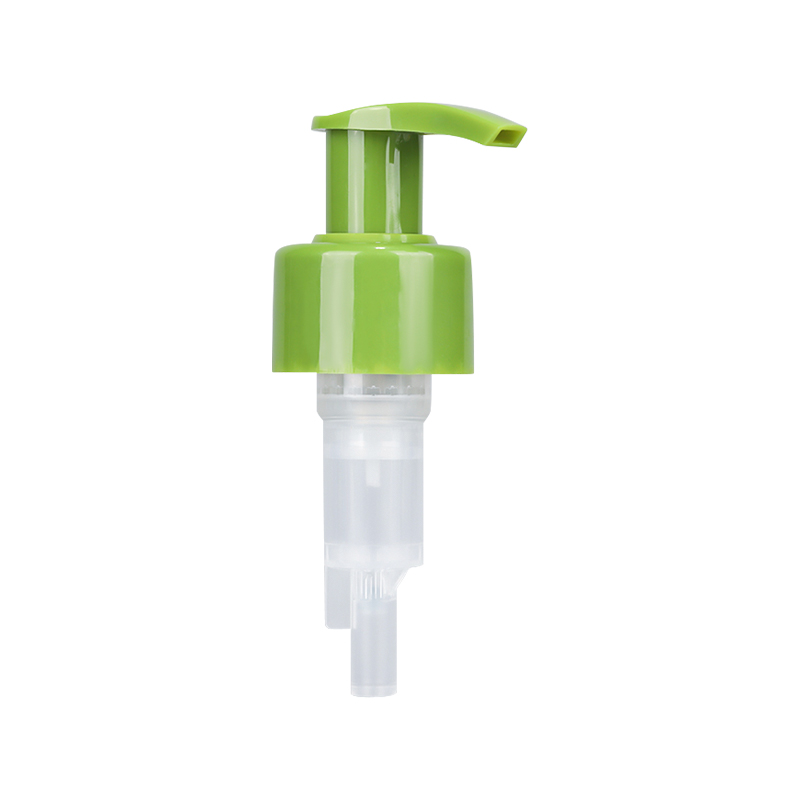
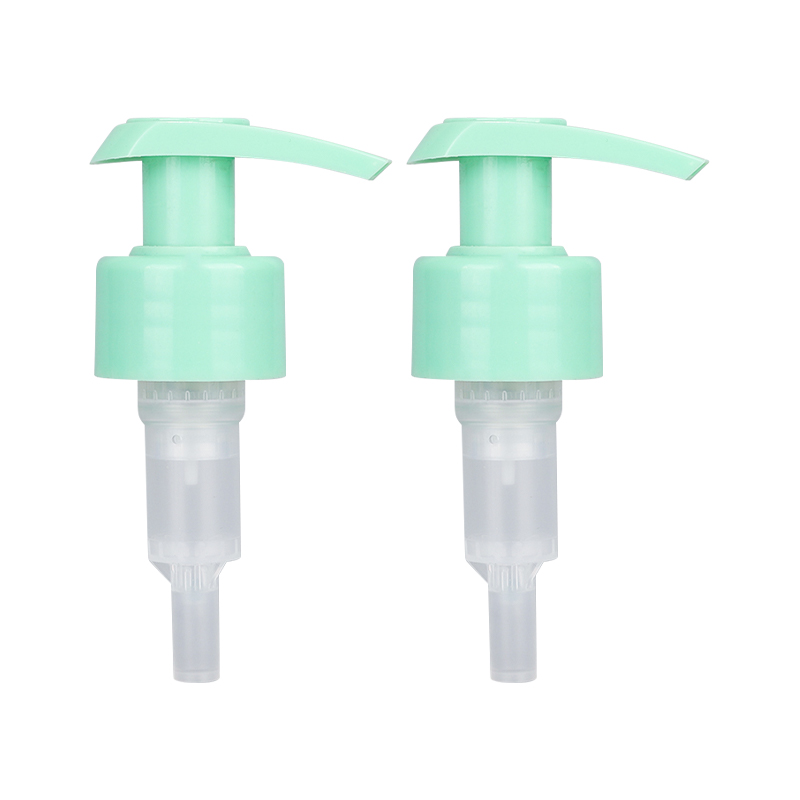
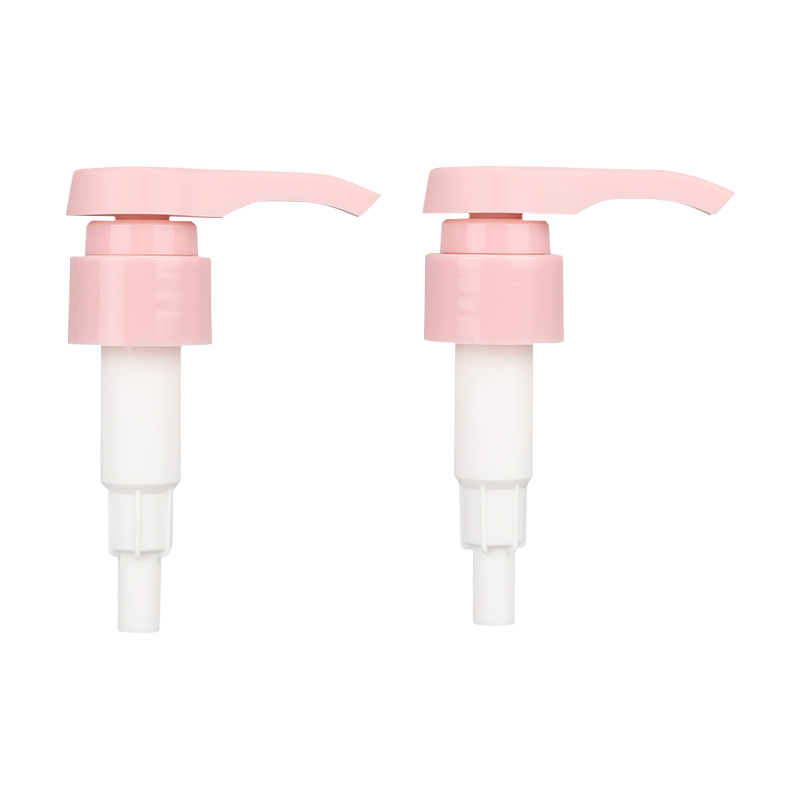
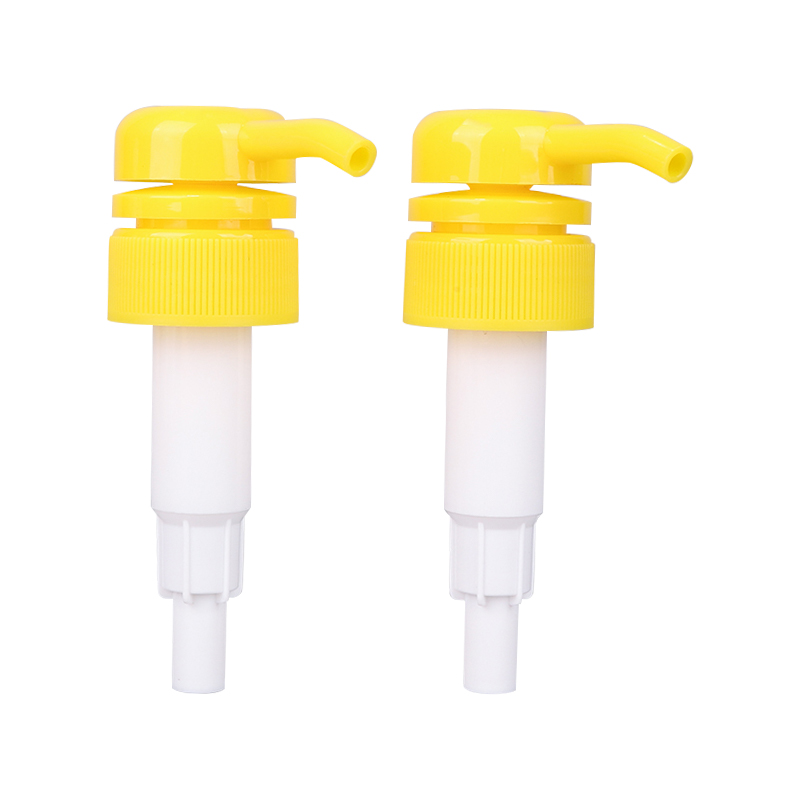
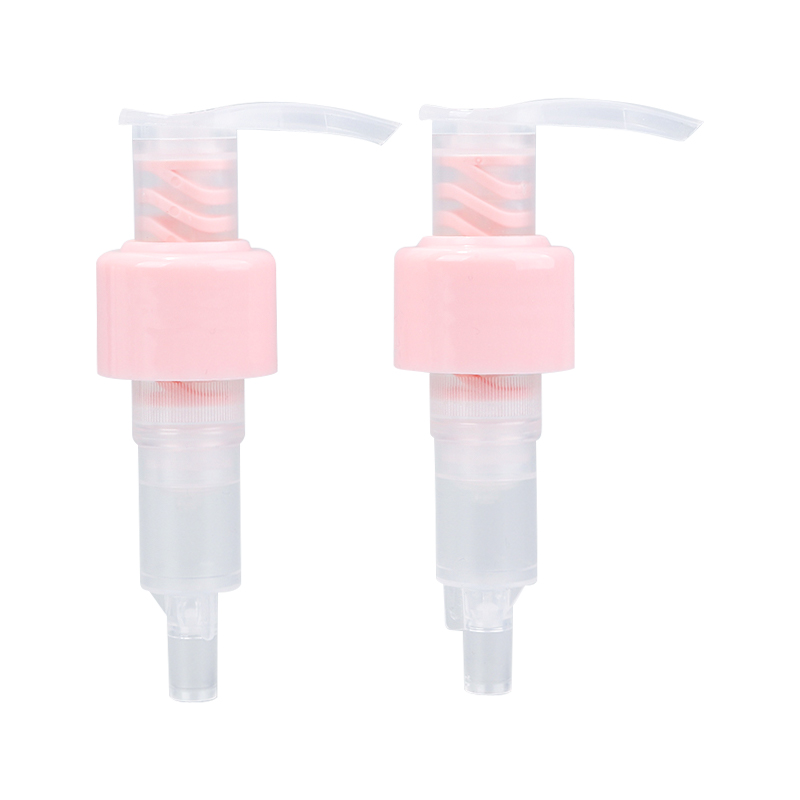
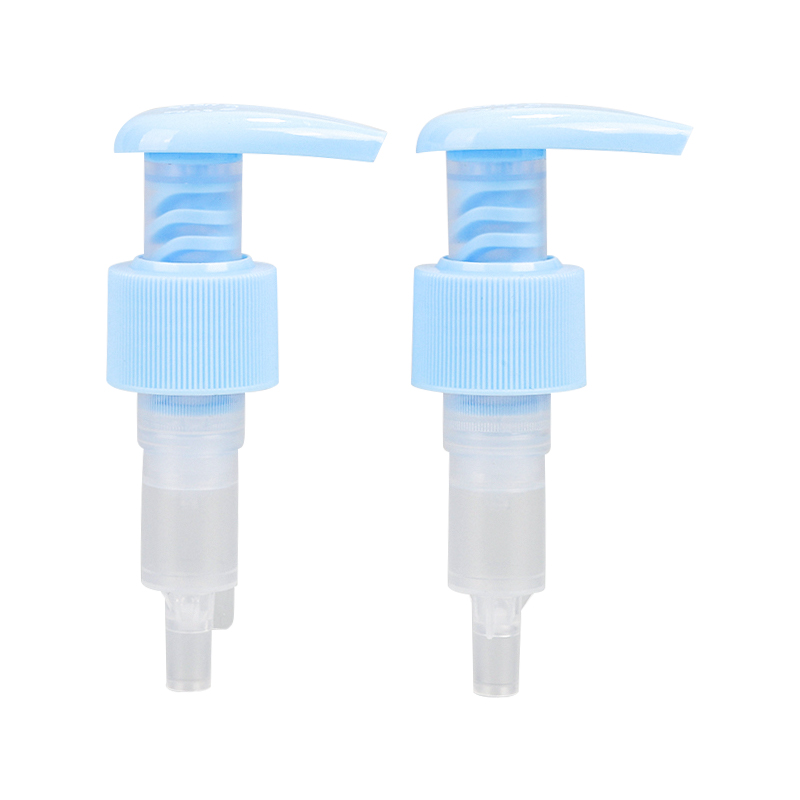
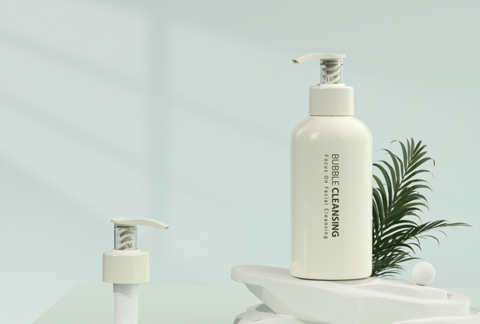
The plastic lotion pump is a relatively simple yet intricately designed mechanism used for dispensing lotion, cream, or other liquid-based products from bottles. The pump mechanism ensures that the user gets a controlled, consistent amount of product with each press, making it convenient and efficient. The structure of a plastic lotion pump includes several key components, each of which plays a critical role in its overall function and durability.
The actuator is the part of the lotion pump that is pressed by the user to dispense the product. It is typically located at the top of the pump and is designed to be easily operated with a finger or palm. When the actuator is pressed, it triggers the internal mechanisms that draw product from the bottle and push it through the nozzle. The actuator is often designed ergonomically to make dispensing easy, and it is sometimes equipped with a locking mechanism to prevent accidental dispensing during storage or transport.
Beneath the actuator lies the spring. The spring provides the necessary force to push the lotion out of the bottle. When the actuator is pressed, the spring compresses and creates a vacuum-like effect that forces the lotion through the dip tube and out of the nozzle. Once the actuator is released, the spring returns to its original position, drawing the lotion back into the pump and preparing it for the next use. The quality and tension of the spring are crucial because if it is too weak, the pump may fail to dispense the product, and if it is too strong, it may require more force to operate.
The dip tube is the part of the pump that extends into the bottle and draws the lotion from the bottom. The dip tube is typically made of flexible plastic, allowing it to bend and fit into the shape of the bottle. Its length can vary, and it is designed to reach as much of the product inside the bottle as possible. A properly sized dip tube ensures that nearly all the product in the bottle is used, which is especially important for lotions or creams with thicker viscosities. If the dip tube is too short, it may leave a significant amount of product behind, leading to product waste.
The valve mechanism within the pump controls the flow of the lotion. There are typically one or two valves within the pump, which control the intake of the lotion from the bottle and its discharge through the nozzle. The valve system ensures that lotion is not dispensed when the pump is not being pressed, preventing leaks or spills. The valve may be a simple spring-loaded mechanism or a more complex system designed to manage the flow more effectively, especially in pumps used for thicker products like creams or gels.
Another important component of a lotion pump is the nozzle. The nozzle is the final stage through which the lotion is dispensed. It can be designed in various shapes and sizes, with some pumps featuring a narrow, controlled nozzle for more precise dispensing, while others may have a broader opening for quicker, larger outputs. Nozzles can also be adjustable to control the amount of product dispensed in each press, a feature that is highly valued in products where dosage accuracy is important, such as in medicinal lotions or premium skincare.
The entire pump assembly is typically housed in a housing unit, which can be made from durable plastic or metal. The material choice for the pump housing affects the pump's durability, resistance to environmental factors, and the cost of the overall product. High-quality plastic is often chosen because it is lightweight, cost-effective, and resistant to many common chemicals, though higher-end pumps may use metal for added strength and premium appearance.
Understanding the various components of a plastic lotion pump gives insight into its operation and why regular cleaning and maintenance are necessary. If any part of the mechanism becomes clogged, broken, or worn out, the pump may stop working effectively, leading to frustration for the user. Proper maintenance can extend the lifespan of the pump and ensure that it continues to function as intended.
2. Why Regular Cleaning of Your Lotion Pump is Essential
Regular cleaning of a plastic lotion pump is vital to ensure that it continues to function effectively and hygienically. Lotion pumps are used to dispense various products, including creams, gels, and lotions, all of which contain different ingredients and viscosities. Over time, residue from these products can build up inside the pump, leading to a host of potential issues such as clogging, inconsistent dispensing, and contamination. Understanding why regular cleaning is essential is key to maintaining the pump’s performance and extending its lifespan.
First and foremost, product buildup inside the pump is one of the most common problems faced by lotion pump users. Ingredients in lotions, creams, or gels can accumulate inside the dip tube, actuator, and valve systems. This buildup is especially noticeable with thicker lotions, which tend to leave behind more residue than lighter products. If the buildup is not cleaned regularly, it can eventually clog the pump, preventing the lotion from being dispensed properly. When the pump is clogged, the actuator may become harder to press, or it may fail to dispense any product at all. A clogged pump is not only frustrating but also wasteful, as it prevents the user from getting the most out of the product inside the bottle.
Another issue that arises from residue buildup is the degradation of the pump’s internal components. Over time, the accumulation of lotion, especially lotions containing oils or silicones, can cause damage to the internal parts of the pump. Oils can break down plastic, causing it to become brittle, while certain ingredients may react with the pump’s seals or springs, weakening them and causing premature wear and tear. Regular cleaning helps to prevent these issues by removing product residues before they have a chance to degrade the materials inside the pump.
In addition to residue buildup, moisture accumulation inside the pump can lead to hygiene concerns. Lotion pumps are frequently exposed to moisture, and if the pump is not cleaned and dried regularly, it can become a breeding ground for bacteria or mold. This is particularly concerning for products used in skincare or cosmetics, where maintaining hygiene is essential to ensure the product’s safety. Any mold or bacteria inside the pump can contaminate the lotion, leading to potential skin irritation or infection. Cleaning the pump thoroughly helps to eliminate any moisture that could encourage microbial growth.
Regular cleaning also prevents airlocks from forming in the pump system. An airlock occurs when air is trapped inside the pump mechanism, preventing the lotion from being dispensed even when the actuator is pressed. This issue can often be resolved by cleaning the pump and ensuring that the valve and dip tube are free from blockages. Cleaning helps to eliminate any air bubbles or debris that may be preventing the smooth flow of lotion from the bottle.
Lastly, regular cleaning ensures that the pump operates efficiently and continues to dispense lotion accurately. Pumps that are cleaned regularly have fewer clogs and smoother valve actions, which results in a more consistent and controlled dispensing of the product. This is particularly important for users who need to measure out specific doses of product, such as in medical or cosmetic applications. Without proper cleaning, the pump may dispense inconsistent amounts, leading to either wastage or insufficient application of the product.
Cleaning your lotion pump regularly is crucial for maintaining its functional efficiency, ensuring hygiene, and preventing premature wear. By incorporating a cleaning routine into your usage habits, you can ensure that the pump continues to work effectively for a longer period of time, minimizing the risk of clogging, bacterial contamination, and product wastage.
3. Step-by-Step Guide to Cleaning Your Plastic Lotion Pump
Proper cleaning of a plastic lotion pump requires more than just a quick rinse under tap water. Since lotion pumps have multiple internal components—such as valves, springs, actuator channels, and dip tubes—residue can accumulate inside areas that are not easily visible. Cleaning these parts thoroughly helps to prevent operational problems like clogging, leakage, and microbial contamination. The following step-by-step process offers a complete cleaning method that is both practical and effective for maintaining a plastic lotion pump over the long term.
Step 1: Disassemble the Pump Mechanism Carefully
Start by removing the pump from the bottle. Unscrew the pump head (actuator) and gently pull the dip tube out of the product container. Most lotion pumps are made up of three primary parts: the actuator or cap, the pump housing with internal components, and the dip tube. Some designs might have a removable spring or valve assembly inside the housing. If accessible, carefully separate the internal parts, but avoid using sharp tools that might damage delicate plastic components. Disassembly helps you reach critical areas like the valve seat and internal bore that are prone to residue buildup.
Step 2: Rinse the Components with Warm Water
Hold all components under warm, running water. This initial rinse helps remove residual lotion from exterior surfaces and flushes out easily dissolved lotion from interior channels. Focus on spraying water through the dip tube and up into the actuator’s nozzle to ensure that any loose product is washed out. However, be mindful of water pressure—too high, and you may damage small moving parts.
Step 3: Soak in a Cleaning Solution for Deep Cleansing
Prepare a gentle cleaning solution by mixing warm water with a mild dish detergent or white vinegar. For every 500ml of water, add one tablespoon of detergent or vinegar. Place all components into the solution and allow them to soak for 20 to 30 minutes. This helps break down sticky, oily, or dried lotion residues from inside the actuator, valve mechanisms, and along the dip tube wall. If the lotion is particularly thick or contains ingredients like silicone or wax, a slightly longer soak (up to one hour) might be required. Do not use alcohol, bleach, or abrasive agents unless you are certain the plastic material of the pump is compatible, as harsh chemicals can degrade the pump over time.
Step 4: Use Precision Tools for Interior Scrubbing
Once soaking is complete, use soft cleaning tools to scrub inner surfaces. A soft toothbrush works well for actuator and spring areas, while cotton swabs, soft pipe cleaners, or interdental brushes are ideal for cleaning inside the dip tube and narrow actuator chambers. Scrub each area gently but thoroughly, paying special attention to the check valve area, the nozzle chamber, and the spring if it is removable. Even a small amount of residue left behind can dry up and lead to blockages in future uses.
Step 5: Rinse Again to Remove Cleaning Agents
After scrubbing, rinse each part under clean, warm water to remove any leftover cleaning solution. Make sure all soap, vinegar, or debris is thoroughly flushed from internal areas. One technique is to draw clean water through the pump mechanism by submerging the dip tube in water and manually pressing the actuator several times to force clean water through the valve and out the nozzle. This mimics normal operation and helps clear internal passages effectively.
Step 6: Air Dry Completely Before Reassembly
Once rinsing is complete, place all components on a clean, lint-free cloth or towel and let them air dry. Ensure that the pump dries completely before reassembling to prevent the growth of mold or bacteria in retained moisture. Drying time depends on environmental conditions but allowing 2–4 hours is typically sufficient. If desired, you can use a small air blower or fan to speed up the drying process.
Step 7: Reassemble the Pump and Perform a Function Test
After drying, reassemble the pump carefully. Insert the spring and valve mechanism back into the housing (if previously removed), attach the dip tube, and screw the actuator back onto the pump housing. Before using the pump with lotion again, test its function by drawing warm water through it. This ensures the pump has been properly reassembled and is working smoothly. Only once you are satisfied with the function should you reinstall the pump onto your lotion bottle.
Regular cleaning following this full process once every 2 to 4 weeks (depending on usage) ensures optimal hygiene and consistent performance. Pumps used for products containing oils, natural extracts, or organic materials should be cleaned more frequently due to higher spoilage risk. Following this routine prevents premature pump failure and guarantees a sanitary experience for users.
4. Best Maintenance Practices to Avoid Common Pump Problems
Maintaining your plastic lotion pump proactively is the most effective way to ensure consistent performance, longevity, and hygienic operation. While cleaning addresses the removal of physical residue, maintenance encompasses a broader set of practices that prevent damage, identify early signs of failure, and optimize the user experience over the pump’s operational life. The following are professional and comprehensive best practices for maintaining plastic lotion pumps used in personal care, cosmetic, or industrial applications.
Inspect Components for Wear and Deformation
Regularly check the pump for physical signs of wear, such as cracks, brittleness, discoloration, or deformation of the actuator and housing. Excessive pressure, repeated use, or chemical exposure can weaken plastics. The spring should retain its tension and alignment; a loose or corroded spring may reduce the force needed to dispense lotion or result in inconsistent discharge. If any component shows signs of fatigue or damage, consider replacing the pump to avoid user dissatisfaction or hygiene risks.
Avoid Using Incompatible Liquids
Each lotion pump is designed for a specific range of viscosities and chemical compatibilities. Thick creams, oil-based serums, exfoliants, or products containing alcohols or solvents may clog or degrade internal parts if not matched with the appropriate pump specification. Use only pumps rated for your product type. For example, high-viscosity lotion pumps feature wider nozzles and stronger springs to handle resistance, while standard pumps may struggle with thick formulations. Always consult technical datasheets or manufacturers’ recommendations when selecting pumps for specific products.
Lock the Actuator When Not in Use
Many lotion pumps include a locking feature that prevents accidental pressing of the actuator. Activating this lock during transport, storage, or when not in use minimizes the risk of leaks and protects the valve mechanism from unnecessary pressure or dirt intrusion. Users often overlook this feature, but using it regularly helps extend the actuator’s mechanical life and maintains the cleanliness of the dispensing nozzle.
Store in Controlled Environments
Environmental conditions such as heat, UV radiation, humidity, or chemical vapors can degrade plastic materials over time. Always store lotion bottles and pumps in cool, dry areas, away from direct sunlight and away from reactive substances. Avoid freezing conditions that may cause lotion to expand and damage the pump. Likewise, high temperatures can cause warping or softening of plastic components, especially if left inside cars, near windows, or in industrial facilities without climate control.
Lubricate Internal Components If Necessary
In certain high-use or high-precision applications, it may be appropriate to lubricate the internal spring or valve with a food-grade or pharmaceutical-grade silicone grease. This should only be done when recommended by the pump manufacturer. Proper lubrication can reduce wear on moving parts and ensure smooth operation. However, overuse or incorrect grease type can contaminate the product or clog internal passages, so this technique should be used sparingly and with care.
Avoid Excessive Force or Improper Use
Users sometimes apply excessive pressure on the actuator, especially when lotion flow is restricted or if the product inside is nearly depleted. This can damage the spring, displace the valve seat, or cause the actuator to snap. Instead, gently prime the pump by pressing several times or tilt the bottle slightly to ensure proper suction. Do not attempt to modify the pump with foreign objects (e.g., poking inside with needles or pins) to resolve clogs—this usually causes more damage.
Replace Dip Tubes for Different Bottle Heights
If the same pump is being reused across multiple bottles of different heights, ensure that the dip tube is cut to the correct length each time. A dip tube that is too long may bend and restrict flow, while one that is too short will leave product behind and draw air into the pump, reducing efficiency. Cutting the dip tube at a 45-degree angle near the base also helps improve suction and minimizes the risk of blockage.
Schedule Maintenance for Bulk or Refillable Systems
For commercial users—such as salons, spas, or cosmetic laboratories—maintenance should be scheduled systematically. Pumps used in refillable or high-capacity bottles must be cleaned, tested, and rotated regularly to prevent performance degradation. Labeling pumps with maintenance dates, checking for operational faults weekly, and replacing worn parts before they fail will improve reliability and customer satisfaction.
Use Dust Caps or Sanitary Covers for Nozzle Protection
Where available, always use dust caps or sanitary covers over the pump nozzle to prevent dirt, lint, or environmental debris from entering the actuator opening. This practice not only protects the integrity of the lotion being dispensed but also reduces the amount of cleaning required. In medical or clinical environments, this is a standard hygiene practice and should be adopted wherever feasible in cosmetic and personal care uses as well.
5. How to Troubleshoot and Fix Common Lotion Pump Issues
Plastic lotion pumps, while generally durable and user-friendly, can still encounter a variety of functional issues over time, especially with frequent usage or exposure to thick, oil-based, or particulate-filled lotions. Troubleshooting these problems requires a clear understanding of the pump’s internal mechanism and how each component can fail under specific conditions. Fixing common lotion pump issues often involves a combination of cleaning, part replacement, and in some cases, reconfiguration of how the pump is used. Below is a breakdown of the most frequent issues and how to address them effectively in practical, hands-on scenarios.
Problem 1: Pump Not Dispensing Any Lotion
When pressing the actuator yields no product, even when the container is full, the problem usually lies in one of three areas: the valve system, the dip tube, or air trapped in the mechanism. First, check that the dip tube is properly inserted and not too short; a short or curled tube may not reach the lotion at the bottom of the bottle, especially if the product is viscous. Airlock is another common issue—especially when the pump is new or recently cleaned—where air becomes trapped in the valve mechanism, preventing suction. To resolve this, submerge the dip tube in clean water and press the actuator several times to prime the pump. If this fails, disassemble the pump and check the valves for clogging or damage. Debris or dried lotion in the intake valve can prevent it from opening under pressure. Soak the pump in warm, soapy water and flush through the actuator to dislodge blockage. If mechanical failure is detected (e.g., a broken spring or cracked valve seat), the component may need to be replaced.
Problem 2: Lotion Leaking from the Nozzle or Base
Leakage can occur either around the actuator’s nozzle or from the connection between the pump and the bottle neck. Nozzle leakage is often due to residue buildup that prevents the valve from sealing properly after dispensing. Cleaning the nozzle chamber and valve seat usually resolves this. Leakage around the bottle neck is frequently caused by improper threading or over-tightening the pump onto the bottle, which damages the threads or gasket. Always align the threads correctly and tighten just enough to form a seal—excessive torque can damage plastic fittings. If the gasket inside the pump’s collar is cracked or missing, replacing the pump or adding a soft rubber washer can restore the seal.
Problem 3: Inconsistent Flow or Sputtering Output
An uneven lotion stream, sometimes mixed with air bubbles, is typically a result of partial airlocks, insufficient lotion in the bottle, or a compromised dip tube. Begin troubleshooting by checking that the dip tube is fully immersed in product. If the lotion level is low, tilt the bottle or add more product to test functionality. Next, examine the dip tube for pinholes or cracks that could allow air to be drawn in with the lotion, disrupting suction. If air is entering the system, the pump may sputter or discharge unevenly. Replace or trim the tube if it’s damaged. Also ensure the actuator is being pressed fully and consistently; incomplete depressions may result in weak suction cycles that fail to draw a full dose.
Problem 4: Pump Actuator Difficult to Press
Resistance or stiffness when pressing the actuator can stem from mechanical wear, spring fatigue, or hardened lotion residues inside the actuator chamber or valve. Begin by disassembling and cleaning all internal parts, including the spring and valve system. Warm water soaks followed by mechanical brushing with soft bristles are generally sufficient to restore smooth movement. If the actuator remains stiff after cleaning, inspect the spring for rust or compression damage, especially in pumps exposed to water-based products or stored in humid environments. In many cases, applying a small amount of food-safe silicone grease to the spring and actuator shaft can restore smooth movement. However, be cautious to avoid contaminating the dispensing path.
Problem 5: Lotion Dispenses Too Slowly or Requires Multiple Presses
When a pump dispenses lotion sluggishly or only after repeated pressing, several causes are possible. High-viscosity lotion may exceed the pump’s pressure tolerance, especially in standard dispensers not designed for thick products. Use a pump specifically rated for high-viscosity products, which features stronger springs and larger diameter valves. Another common cause is partial clogging of the dip tube or the valve path due to dry product residues or debris. A thorough internal cleaning followed by soaking in hot water or vinegar usually helps dissolve hardened material. Finally, check if the pump's return spring is too weak to fully reset the actuator between uses. If so, replacing the spring or using a higher-tension version may improve responsiveness.
Problem 6: Continuous Dripping After Dispensing
Some pumps exhibit a slow drip from the nozzle after dispensing, which not only wastes product but creates a mess. This is commonly caused by internal valve failure, where the check valve does not fully close after pressure is released. The most effective solution is to clean or replace the internal valve component. In lower-quality pumps, the internal valve is molded into the housing and cannot be repaired, in which case full pump replacement is the only solution. Using lotion pumps with a built-in anti-drip valve or a lockable actuator can help prevent this in future usage.
Final Fixes and Preventive Steps
After addressing any specific issue, always reassemble the pump and test it with clean water before returning it to regular use. Keep spare pumps on hand, especially in professional settings like spas or cosmetic counters, where performance must be consistent. Users should avoid quick, forceful pressing of the actuator, which can stress internal components. Instead, consistent, full strokes maintain proper flow. Most importantly, implement a routine cleaning and inspection schedule—catching problems early prevents small issues from developing into complete pump failure.
6. Selecting the Right Cleaning Agents and Tools for Your Lotion Pump
Choosing the appropriate cleaning materials for your lotion pump is just as critical as the act of cleaning itself. Using the wrong cleaning agents or abrasive tools can damage internal pump components, degrade seals, or cause chemical reactions that leave residues harmful to both the product and the user. Effective cleaning must balance thorough residue removal with material safety, especially when dealing with pumps made from different types of plastic, elastomer seals, or spring metals. This section outlines how to select proper cleaning agents, tools, and processes that maintain the integrity and longevity of your lotion pump.
Choose Compatible Cleaning Agents Based on Material Type
Plastic lotion pumps are usually made from polypropylene (PP), polyethylene (PE), or sometimes acrylonitrile butadiene styrene (ABS). These plastics are generally resistant to mild acids and bases but can degrade when exposed to harsh solvents, concentrated alcohols, or strong oxidizing agents like bleach. When choosing a cleaning agent, always refer to the material safety data sheet (MSDS) of your pump or consult the manufacturer. For general cleaning, mild dishwashing soap diluted in warm water is the safest option. This combination is gentle on plastics but effective at dissolving lotion, oil, and wax-based residues.
Use Natural Cleaners Like Vinegar or Baking Soda for Mild Disinfection
For users who prefer non-chemical cleaning methods or wish to avoid synthetic detergents, white vinegar and baking soda are effective alternatives. Vinegar’s mild acetic acid can dissolve mineral buildup and break down oils without damaging plastic components. It also provides a degree of antibacterial action. Baking soda, on the other hand, is slightly abrasive yet gentle enough to scrub off stubborn residues when used as a paste. A mixture of warm water, vinegar, and a small amount of baking soda can serve as an all-purpose cleaning solution that is safe for almost all types of lotion pumps.
Avoid Using Alcohol or Bleach Unless Absolutely Necessary
While isopropyl alcohol (IPA) is commonly used for sterilization in medical settings, prolonged exposure to high concentrations (above 70%) can dry out rubber gaskets, cause plastic brittleness, and strip lubricants. Bleach is highly effective as a disinfectant but should be avoided in lotion pumps due to its high pH and potential to corrode metal springs or chemically alter plastic polymers. If sterilization is required—for instance, in medical or laboratory applications—use low concentrations of IPA and rinse thoroughly with distilled water to prevent residue buildup.
Select the Right Cleaning Tools for Different Pump Parts
Different components of the pump require specialized cleaning tools for proper maintenance. Soft-bristled brushes, such as baby bottle brushes or nail cleaning brushes, are ideal for cleaning actuator cavities and exterior surfaces. For small internal parts like dip tubes, nozzles, and valve inlets, use narrow, flexible pipe cleaners or interdental brushes that can reach deep into narrow channels. Cotton swabs are effective for cleaning the undersides of actuator buttons and valve gaskets. Always avoid metal picks or abrasive scrubbers, which can scratch or puncture sensitive internal surfaces, weakening the plastic or affecting the seal.
Consider Ultrasonic Cleaning for Reusable Pumps in Industrial Settings
Ultrasonic cleaners are widely used in laboratories and manufacturing environments for cleaning intricate components. These machines use high-frequency sound waves to agitate cleaning fluids, dislodging particles from hard-to-reach crevices. Lotion pump components, especially those with intricate valve geometries or fine springs, benefit from ultrasonic cleaning, provided they are made from compatible materials. Only use distilled water or manufacturer-approved solutions to avoid chemical reactions during the ultrasonic process.
Rinsing and Drying Techniques Are as Critical as Washing
After using any cleaning agent, it’s essential to rinse thoroughly with clean, preferably distilled water. Tap water may contain minerals that can leave behind deposits, especially inside narrow valve paths or spring chambers. Residue from cleaning agents can chemically interact with lotions and cause discoloration, separation, or irritation during use. Air drying is the safest method, but components must be placed in a clean, dust-free environment to avoid contamination. Do not use heat sources like hairdryers unless you are certain the plastic is heat-resistant, as deformation is a common risk.
Store Cleaned Tools Separately and Sanitize Periodically
Brushes and cleaning tools should be stored separately from everyday kitchen or bathroom tools. Label them for pump use only and sanitize them weekly if used frequently. Storing tools in sealed containers prevents contamination, and replacing brushes or swabs regularly ensures hygiene. In professional or commercial environments, tools should be maintained under standard operating procedures with documented sanitation cycles.
7. Impact of Lotion Viscosity and Ingredients on Pump Maintenance
The performance and maintenance requirements of a plastic lotion pump are directly influenced by the physical and chemical characteristics of the lotion it dispenses. In particular, viscosity—the thickness or flow resistance of a liquid—plays a central role in how a lotion moves through the pump’s internal pathways. At the same time, the ingredients used in the formulation—such as oils, alcohols, natural extracts, silicones, and exfoliants—also affect the durability, clogging potential, and long-term hygiene of the pump. Understanding these relationships is critical for optimizing pump selection, usage, and maintenance practices across both personal care and industrial product applications.
Viscosity Classification and Its Pumping Behavior
Lotion viscosity can range from very light, almost water-like formulations (below 100 centipoise) to extremely thick, paste-like products (above 10,000 centipoise). Low-viscosity products tend to flow freely and are easier to dispense through standard pumps that have smaller valves, narrow dip tubes, and light-tension springs. These pumps do not require much suction force, and the risk of clogging is relatively low. However, if the lotion is too thin and the pump lacks a non-return valve or check valve, it may result in dripping, backflow, or product leakage due to poor seal control.
In contrast, high-viscosity lotions such as body butters, cold creams, or medicated ointments are significantly harder to dispense. These products require high-output pumps with larger internal chambers, stronger springs to overcome resistance, and wider dip tubes to reduce flow restriction. If a standard pump is used with a high-viscosity lotion, it will likely produce weak flow, require repeated pressing to prime the pump, and place mechanical strain on internal parts like the actuator shaft and spring. Over time, this strain can cause the pump to fail prematurely, either through spring fatigue, cracked components, or distorted valve seals.
Clogging Risks and Maintenance Frequency Based on Viscosity
Thicker lotions do not just require more force to dispense—they are also far more prone to residual accumulation. After each use, a small amount of lotion may remain inside the pump’s valve chamber or nozzle. With high-viscosity products, this residual is more likely to solidify or dry out between uses, especially if exposed to air. As the build-up increases, the flow path becomes partially or completely obstructed, requiring the user to press harder or clean the pump more frequently.
To address this, manufacturers recommend more frequent cleaning cycles for pumps used with thick lotions. Cleaning every 7–10 days can prevent major blockages and preserve the pump’s functional integrity. If used in a humid environment or exposed to temperature fluctuations, such as in spas or clinics, the residual lotion can also absorb moisture or encourage bacterial growth, increasing the need for sanitization and inspection.
Pump Material Compatibility with Active Ingredients
Beyond viscosity, the specific ingredients within the lotion also affect pump performance and maintenance requirements. Lotions with essential oils, fragrance compounds, or botanical extracts can react with certain plastic polymers used in pump construction, especially if the pump is not manufactured with chemical-resistant materials. Polypropylene (PP) and polyethylene (PE) are commonly used because of their balance between cost and resistance to a range of chemicals. However, aggressive oils like citrus, mint, or tea tree can soften or weaken these plastics over time.
Some ingredients—particularly alcohols, glycols, or solvents—can accelerate the degradation of rubber gaskets or elastomer seals. This leads to loss of suction, valve leaks, or actuator instability. To mitigate this, users should verify that the pump materials are compatible with their lotion formula. For alcohol-based sanitizers or products with high solvent content, pumps made with fluoropolymer-coated components or silicone-based seals may be necessary to avoid chemical breakdown and maintain durability.
Impact of Silicone and Emollient Ingredients
Many moisturizing lotions contain silicones (e.g., dimethicone, cyclopentasiloxane) or emollients (e.g., lanolin, mineral oil, petrolatum). While these ingredients improve skin feel and barrier performance, they tend to be hydrophobic and film-forming, which makes them harder to rinse off internal surfaces during cleaning. When they accumulate inside the pump, they create a sticky residue that gradually reduces spring responsiveness and causes valve sticking or inconsistent flow.
This issue can be especially problematic in pumps used intermittently, such as travel-sized products or seasonal cosmetics. Pumps that sit unused for long periods while containing silicone-based residues are more likely to seize or fail upon reuse. Regular maintenance with warm water and detergent or a degreasing solution (compatible with the pump’s materials) is necessary to break down the hydrophobic layer and restore functionality.
Natural and Organic Formulations: Microbial and Sedimentation Issues
Lotion pumps used for natural, organic, or preservative-free products face a different set of maintenance challenges. These formulations may include plant oils, herbal infusions, or powdered ingredients (such as oatmeal, clay, or charcoal) that are prone to sedimentation or microbial growth. When these particles settle inside the dip tube or valve chamber, they can form physical obstructions or foster bacterial colonies, especially if the product is stored in warm or humid conditions.
For these types of lotions, users must implement a stricter cleaning schedule—sometimes weekly—and always ensure full drying before reassembly. If possible, use pumps that are easy to disassemble for thorough cleaning. For bulk storage, manufacturers may use filtration steps before bottling to remove large particles and reduce pump blockage risks.
Colorants and Dyes: Staining and Residue Retention
Another often overlooked issue is the impact of artificial colorants or natural dyes on pump cleanliness and appearance. Vividly colored lotions, especially those with red, blue, or yellow pigments, can stain internal components. Even after cleaning, the plastic nozzle or dip tube may retain a tint, which might appear unclean or visually inconsistent, especially in clear packaging. While this does not always affect functionality, it may influence consumer perception in product reuse or refill programs. Choosing pumps with darker-colored components or pigmented plastics can minimize the visual impact of staining.
Foaming and Emulsified Formulations
Some lotions include surfactants or air-entrained emulsifiers that cause foaming during dispensing. These products may require pumps with vented valve systems or anti-foaming mechanisms to ensure even flow and prevent product from backing up into the actuator or nozzle. Failure to use the correct pump type can lead to product waste, splatter, and hygiene issues, as foamed lotion dries rapidly and leaves behind sticky films. Maintenance for these pumps should include checking vent holes and cleaning actuator chambers more frequently, as dried foam residue can cause misfires and uneven actuator travel.
Temperature-Dependent Behavior of Lotion Viscosity
Finally, the storage and use temperature of the lotion significantly influences both viscosity and pump maintenance. Most lotions become thicker in cold environments and thinner in warm conditions. When stored below room temperature, lotions may become too thick to dispense through a regular pump, resulting in excessive pressure on the actuator and spring. Conversely, overheated lotions may become runny and leak from the nozzle due to reduced internal resistance. Pumps should always be selected and tested under actual usage conditions to verify performance. Regular recalibration of pump specifications in line with seasonal or regional temperature changes is recommended for industrial and commercial applications.

 English
 русский
 Français
 Español
 italiano